ML 모델 서빙 워크플로우
Feature Store에 특성을 등록하고, MLflow로 모델을 학습/기록한 후, 서빙 엔드포인트에 배포하는 전체 워크플로우를 안내합니다.
사전 준비
- 관리자 또는 analyst 역할로 로그인
- MLflow 서버 실행 중 (
kubectl get pod -n gend | grep mlflow) - 샘플 데이터 적재 (
make seed-demo)
전체 워크플로우
1단계: Feature Store 특성 등록
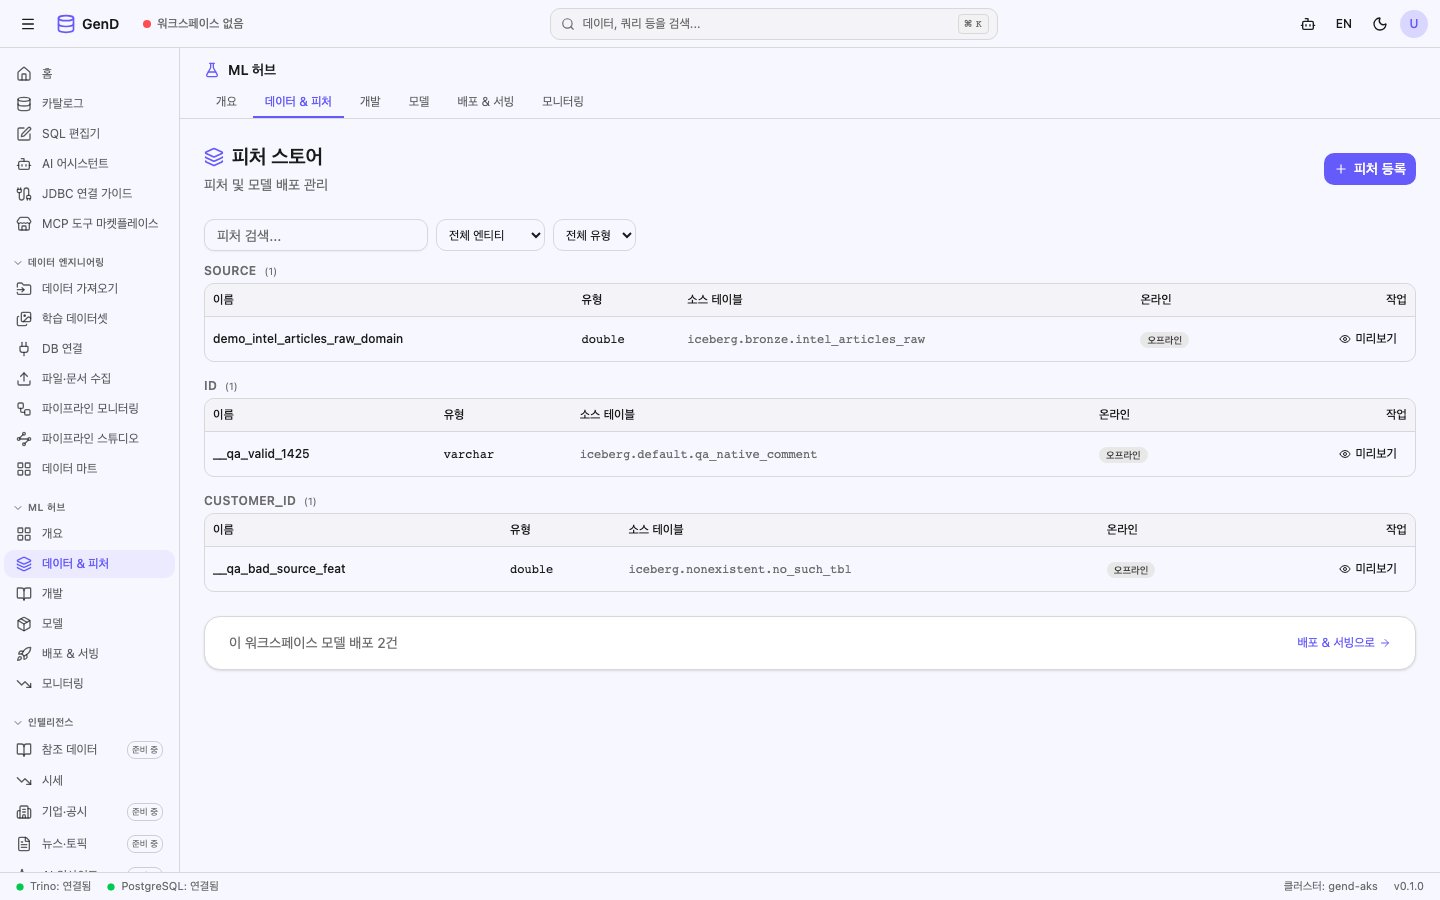
사이드바 → ML 허브 → 데이터 & 피처 스테이지(/ml-hub/features — 피처 스토어)를 클릭합니다.
1-1. 특성 정의 등록
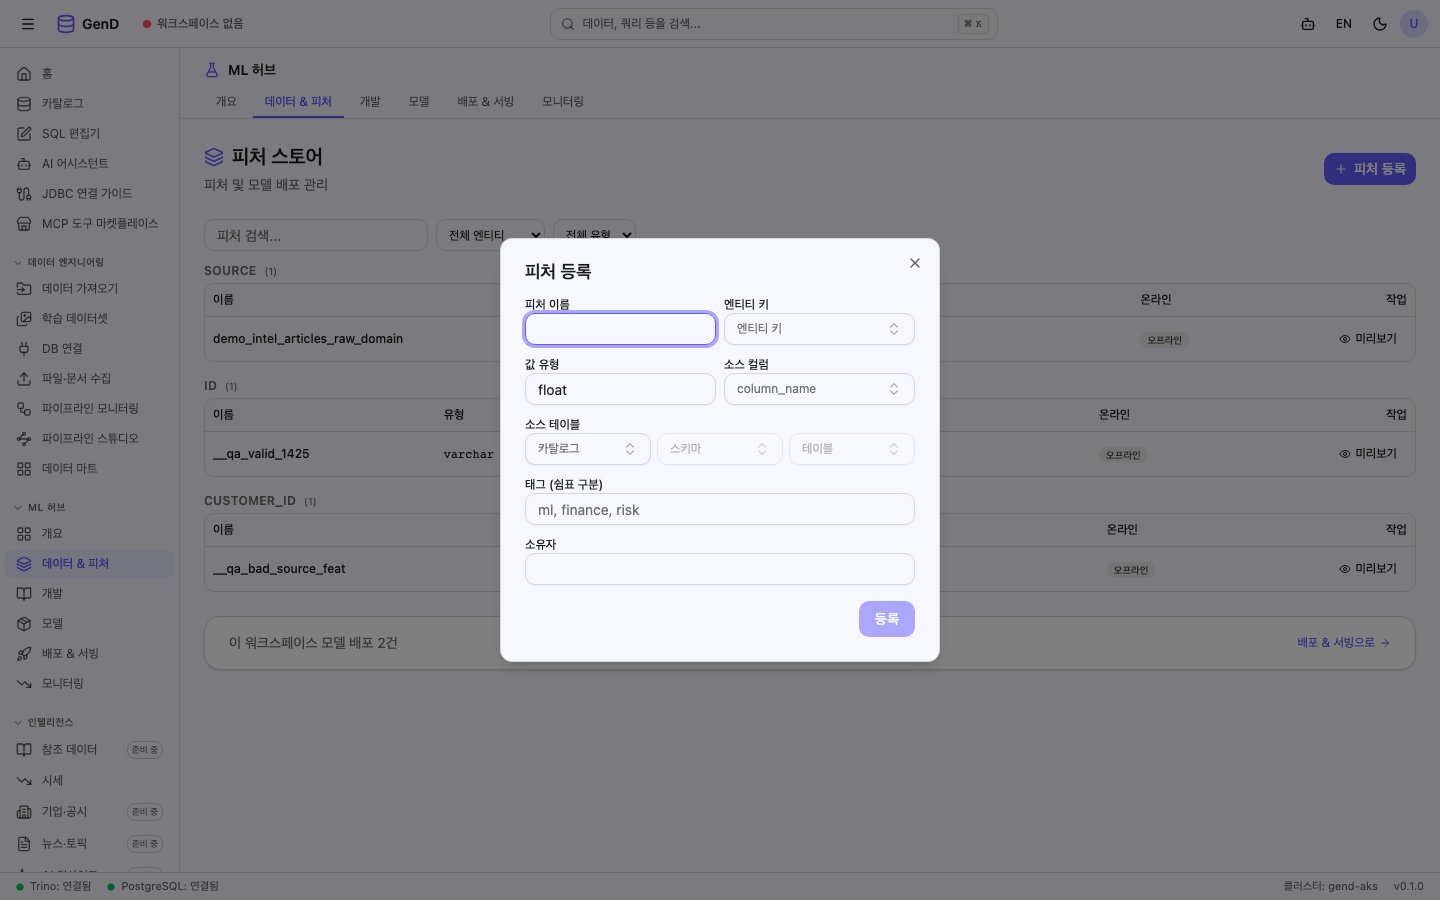
Register 버튼을 클릭하고 다음 값을 입력합니다:
| 필드 | 값 | 설명 |
|---|---|---|
| Feature Name | customer_credit_features | 특성 그룹 이름 |
| Entity Key | customer_id | 조인 키 |
| Source Table | sourcedb.public.credit_assessments | 원본 테이블 |
| Description | 고객 신용 평가 기반 ML 특성 | 설명 |
| Tags | credit, risk | 태그 |
1-2. 특성 미리보기
등록 후, 특성 행의 미리보기 아이콘을 클릭하면 Trino에서 최신 10건의 데이터를 로드하여 표시합니다:
| customer_id | credit_score | dti_ratio | risk_grade | is_delinquent |
|---|---|---|---|---|
| C00001 | 750 | 0.28 | A | false |
| C00002 | 620 | 0.42 | C | false |
2단계: JupyterLab에서 모델 학습
사이드바 → ML 허브 → 개발 스테이지의 노트북 탭(/ml-hub/develop?tab=notebooks)에서 서버를 시작하고 JupyterLab을 엽니다.
2-1. 데이터 로드
from trino.dbapi import connect
import pandas as pd

conn = connect(
    host="trino.gend.svc.cluster.local",
    port=8080,
    user="notebook-user",
    catalog="sourcedb",
    schema="public",
)

# Feature Store에서 정의한 특성 로드
df = pd.read_sql("""
    SELECT
        ca.customer_id,
        ca.credit_score,
        ca.dti_ratio,
        ca.risk_grade,
        ca.is_delinquent,
        c.annual_income,
        c.credit_score AS current_score
    FROM credit_assessments ca
    JOIN customers c ON ca.customer_id = c.customer_id
""", conn)

print(f"로드된 행 수: {len(df):,}")
df.head()
2-2. 특성 엔지니어링
import numpy as np

# 파생 특성 생성
df['score_change'] = df['current_score'] - df['credit_score']
df['high_dti'] = (df['dti_ratio'] > 0.4).astype(int)
df['risk_encoded'] = df['risk_grade'].map(
    {'A': 0, 'B': 1, 'C': 2, 'D': 3, 'E': 4}
)

# 타겟: 연체 여부
y = df['is_delinquent'].astype(int)
X = df[['credit_score', 'dti_ratio', 'annual_income',
        'score_change', 'high_dti', 'risk_encoded']].fillna(0)
2-3. 모델 학습 + MLflow 기록
from sklearn.ensemble import GradientBoostingClassifier
from sklearn.model_selection import train_test_split
from sklearn.metrics import accuracy_score, precision_score, recall_score, f1_score
import mlflow

X_train, X_test, y_train, y_test = train_test_split(
    X, y, test_size=0.2, random_state=42, stratify=y
)

mlflow.set_tracking_uri("http://mlflow.gend.svc.cluster.local:5000")
mlflow.set_experiment("delinquency-prediction")

with mlflow.start_run(run_name="gbm-v1"):
    model = GradientBoostingClassifier(
        n_estimators=200, max_depth=5, learning_rate=0.1
    )
    model.fit(X_train, y_train)
    y_pred = model.predict(X_test)

    # 메트릭 기록
    mlflow.log_param("model_type", "GradientBoosting")
    mlflow.log_param("n_estimators", 200)
    mlflow.log_metric("accuracy", accuracy_score(y_test, y_pred))
    mlflow.log_metric("precision", precision_score(y_test, y_pred))
    mlflow.log_metric("recall", recall_score(y_test, y_pred))
    mlflow.log_metric("f1", f1_score(y_test, y_pred))

    # 모델 아티팩트 저장
    mlflow.sklearn.log_model(model, "model")

    print(f"Accuracy: {accuracy_score(y_test, y_pred):.4f}")
    print(f"F1 Score: {f1_score(y_test, y_pred):.4f}")
3단계: MLflow 실험 확인
사이드바 → ML 허브 → 실험 스테이지(/ml-hub/experiments)에서 실험 결과를 확인합니다.
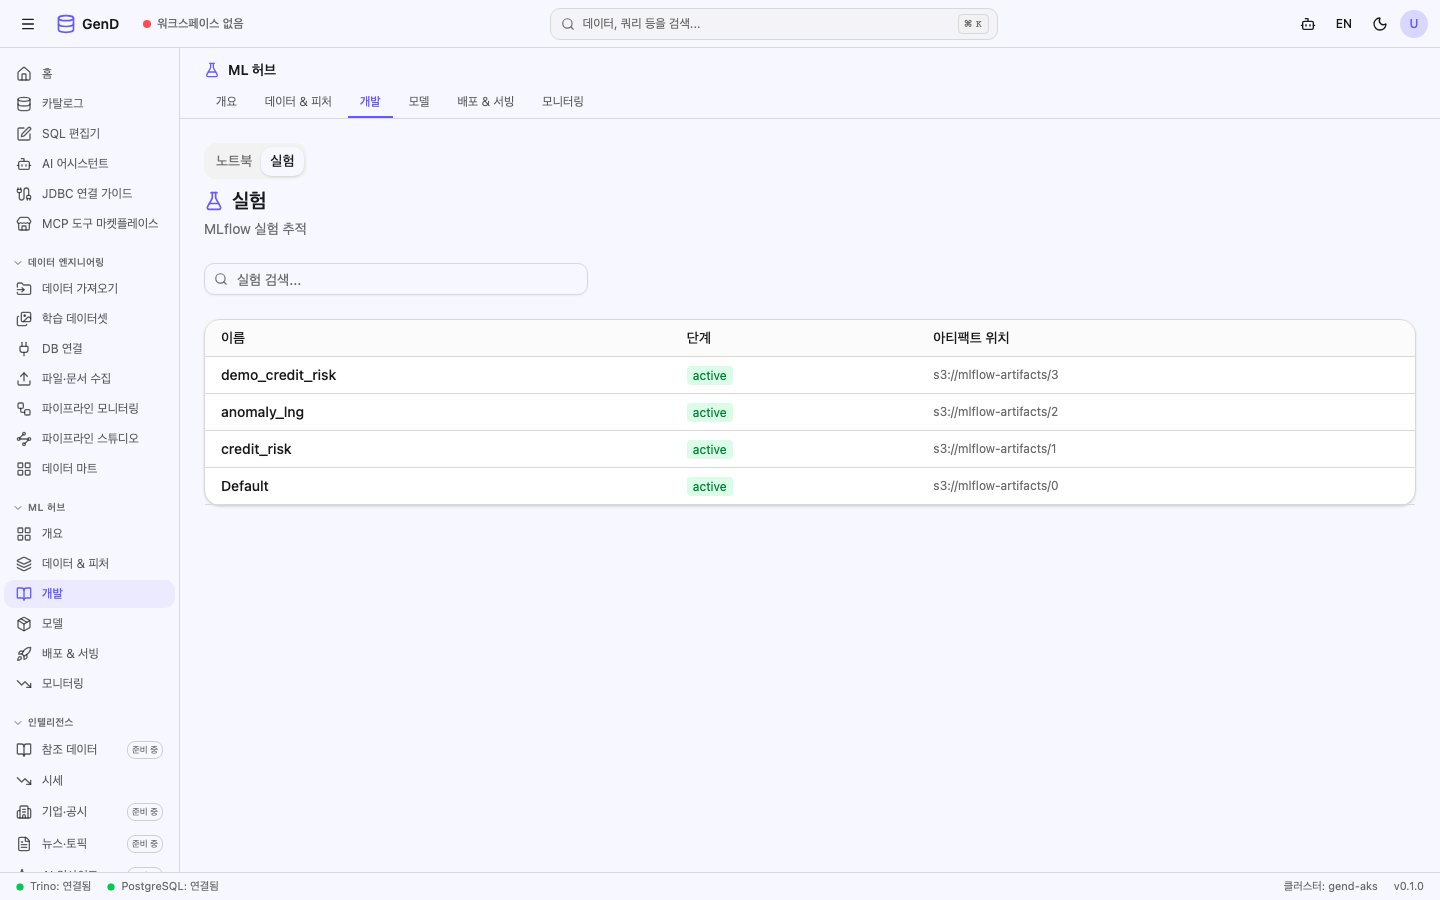
delinquency-prediction 실험을 클릭하면 각 실행(run)의 메트릭, 파라미터, 아티팩트를 비교할 수 있습니다.
4단계: 모델 레지스트리 등록
사이드바 → ML 허브 → 모델 스테이지(/ml-hub/models?tab=registered — 등록 모델)를 클릭합니다.
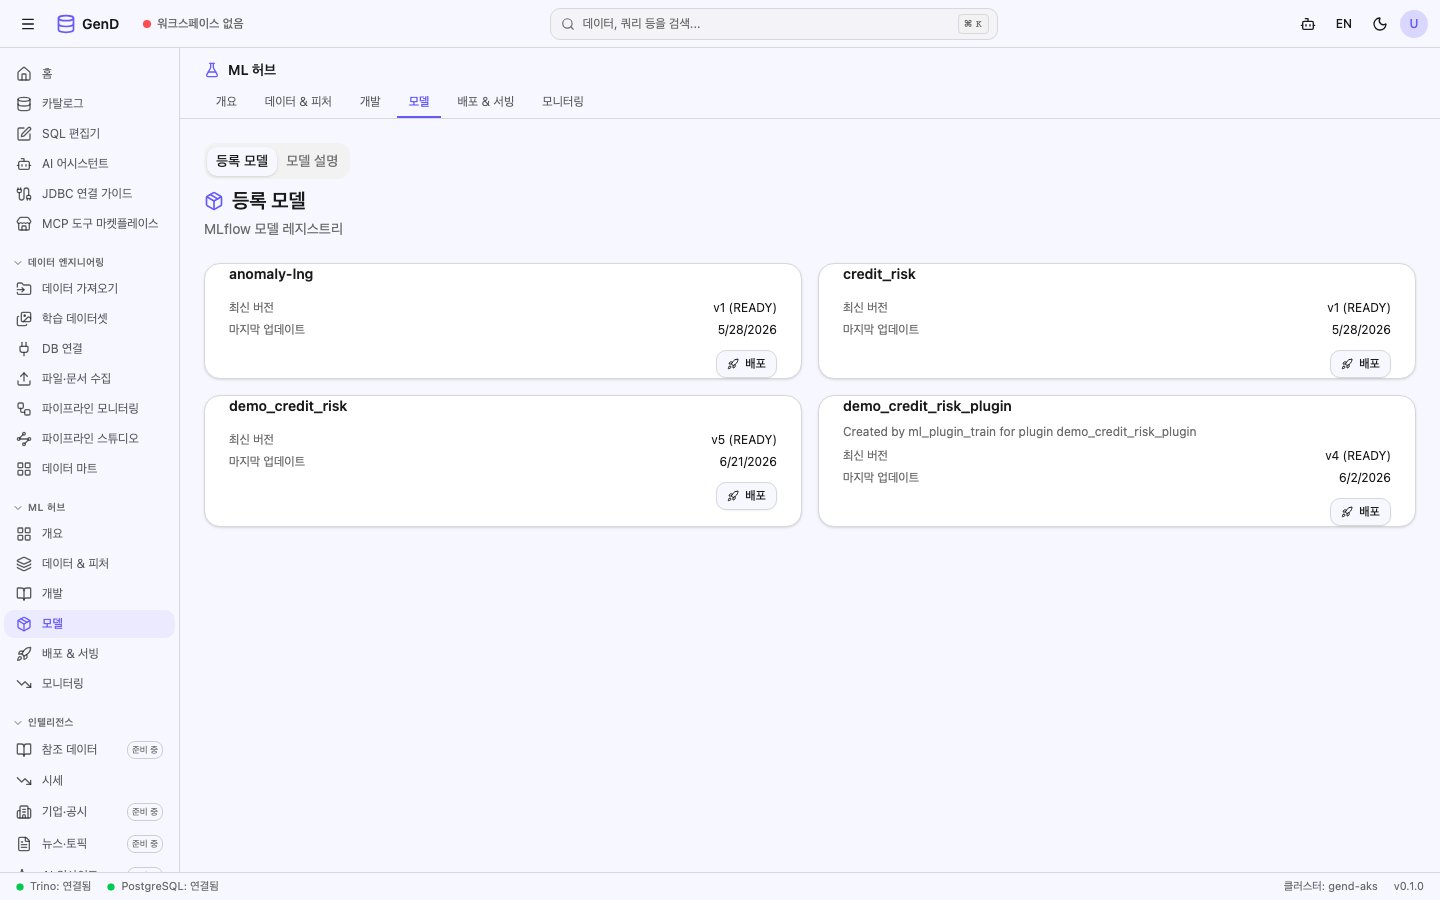
JupyterLab에서 다음 코드로 모델을 레지스트리에 등록합니다:
import mlflow

mlflow.set_tracking_uri("http://mlflow.gend.svc.cluster.local:5000")

# 최신 run에서 모델 등록
result = mlflow.register_model(
    model_uri="runs:/<run_id>/model",
    name="delinquency-predictor"
)

# 프로덕션 스테이지로 전환
client = mlflow.MlflowClient()
client.transition_model_version_stage(
    name="delinquency-predictor",
    version=result.version,
    stage="Production"
)
5단계: 서빙 엔드포인트 배포
사이드바 → ML 허브 → 데이터 & 피처 스테이지(피처 스토어)에서 Deploy 버튼을 클릭합니다. 배포된 엔드포인트는 배포 & 서빙 스테이지(/ml-hub/serving)에서 관제합니다.
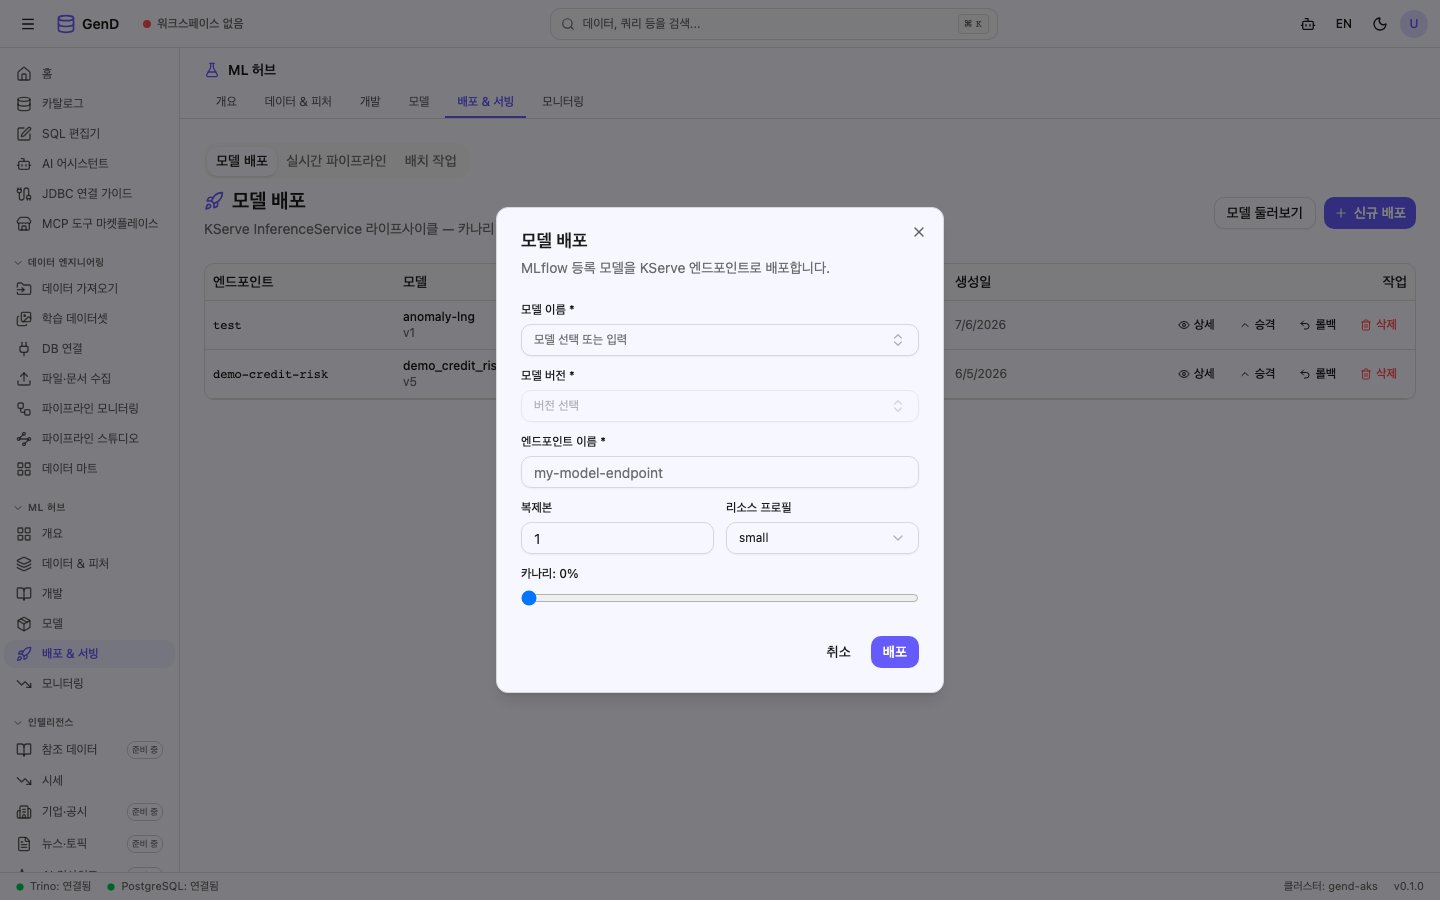
| 필드 | 값 | 설명 |
|---|---|---|
| Endpoint Name | delinquency-predictor-v1 | 엔드포인트 이름 |
| Model Name | delinquency-predictor | MLflow 모델명 |
| Model Version | 1 | 모델 버전 |
| Instance Type | Standard_D2s_v3 | 인스턴스 타입 |
| Min Instances | 1 | 최소 인스턴스 |
| Max Instances | 3 | 최대 인스턴스 (오토스케일) |
배포 요청 후 상태가 pending → deploying → running으로 전환됩니다.
6단계: 카나리 배포 + 모니터링
6-1. 카나리 트래픽 조정
새 모델 버전을 배포할 때, 카나리 배포로 점진적 트래픽 전환이 가능합니다:
v1 (현재 프로덕션) ← 90% 트래픽
v2 (카나리 버전)   ← 10% 트래픽
카나리 비율을 10% → 25% → 50% → 100%로 점진적으로 올리면서 메트릭을 모니터링합니다.
6-2. 서빙 메트릭 모니터링
배포된 엔드포인트의 성능 메트릭:
- Latency (p50/p95/p99): 추론 응답 시간
- Request Rate: 초당 요청 수
- Error Rate: 에러 비율
- CPU/Memory: 리소스 사용량
AI Agent Chat으로 수행하기
사용자: "신용 평가 데이터로 연체 예측 모델 만들어줘"
AI: Feature Store에 customer_credit_features를 등록하고,
    GBM 모델을 학습하여 MLflow에 기록했습니다.
    F1 Score: 0.87, Accuracy: 0.94
    모델을 레지스트리에 등록할까요?

사용자: "등록하고 서빙 배포까지 해줘"
AI: delinquency-predictor v1을 프로덕션으로 등록하고,
    서빙 엔드포인트를 배포했습니다. 상태: running